Posts tagged college cooking

Who said leftovers had to be the worst part?

I hate leftovers.  Hate, hate hate.  But when you’re living on a low budget and don’t have time to create a show-stopper every night, you occasionally do have to turn to them, and in this case, it’s actually a pretty great alternative.  Since i make the bruschetta recipe that I shared with you in my last post so often, I figured I’d follow up with a way to use the leftover bruschetta for lunch or dinner the next day.  It’s an easy open-faced chicken and bruschetta sandwich, and it’s almost as good as eating it fresh!

You’ll need:

  • The leftover bruschetta
  • If you have leftover french baguette (a decent sized chunk), then you’re all set; otherwise you might want to go buy some (it’s cheap!) or use another type of bread you have in your kitchen.
  • Shredded mozzarella or parmesan cheese (you probably have this leftover as well): about a tablespoon or two
  • Grilled chicken breast.  I usually have a lot of leftover chicken, which is why this recipe works out perfectly, but if you don’t you’ll need one boneless breast
  • Black pepper
  • Garlic powder
  • olive oil

Directions:

  1. If you don’t have leftover chicken that’s been prepared already, you’ll need to either grill or saute it in a pan, and using Italian or Balsamic dressing would be your best bet.
  2. Pre-heat the oven to 375 degrees.
  3. Slice the chunk of baguette in half and lightly coat each side with olive oil.
  4. Sprinkle garlic salt and black pepper over each piece.
  5. Layer on the shredded cheese, covering the entire surface of each piece, but don’t over-do it, otherwise the bread will take longer to crisp
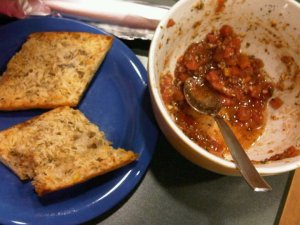
  6. Place the two slices of bread on a baking sheet separately (see picture below) in the oven for about 15-17 minutes, or until the cheese is melted and the edges are a crispy golden brown.
  7. When the bread is done, take it out and give it a minute to cool before adding the toppings.
  8. First layer on the bruschetta (you can add it to one side or both sides of the bread, depending on how hungry you are).
  9. Then add your sliced grilled chicken: thin slices work the best, since it’s already a pretty hefty sandwich. 
  10. If you’d like top it off with some black pepper or parsley, but not too much, since the bruschetta already has a lot of spices in it.


And that’s all!  If you already have all the leftovers, it’s a zero-cost meal.  Enjoying the sandwich with a salad makes for a healthy option: you’ve got your greens and protein covered.  Not too mention it’s delicious and will keep you full for the rest of the day.  Enjoy!

Here’s a picture step by step:

The short and sweet ingredients list:

Slice the baguette evenly:

Brush with olive oil and sprinkle black pepper and garlic salt, then add the shredded cheese:

Throw the bread in the oven at 375 for about 15-17 minutes:

When it’s out, give it a few minutes then add the bruschetta topping and grilled chicken (sorry this picture is blurry!)

Now you’re ready to serve, here’s the finished product:

Looking for some other recipes to incorporate leftovers into?  Check out these great resources:

TheLeftoverChef.com: just like it sounds, tons of great leftover recipes

A leftover recipes index from TerisKitchen.com

One of my favorite websites that shares recipes using leftovers to save time (perfect!)

Comments (1) »

This one’s for Mom

This is hands down the easiest recipe you’ll ever use.  It’s my Mom’s favorite, and every time I come home the first thing she does is tell me to make it (if she’s not home she’ll leave a note telling me to, because she wants it ready for when she gets home).  I turn to it for parties, dinners, snacks… you name it and I guarantee you, this one’s a winner.  It’s bruschetta that’s based off a recipe I got from an easy Italian recipe book made by Hunt’s, and it’s so simple but so delicious (the perfect combo if you ask me).  If you’re like me and your kitchen is always fully stocked with spices, then you’re good to go.  If not, you may have to grab a few things or skip a few steps.  It’s always beneficial to keep the basic spices around if you ask me, and if you’ve been reading most of my posts, you’ll notice they certainly won’t go to waste (I use basil, oregano and black pepper in anything I possibly can).  Without further delay, I give you my favorite recipe of all time:

You’ll need:

  • One 28 oz can of Petite Diced Tomatoes (the original kind works best), or smaller if you’re serving less people
  • Olive oil
  • Chopped garlic. The wet kind that comes in a jar works great for this recipe, but you can also use cloves
  • Dried garlic powder (yes you’ll need this kind in addition to the other kind)
  • Dried oregano
  • Dried basil
  • Dried crushed red pepper(only a dash or so)
  • Ground black pepper
  • A dash of salt to taste
  • French baguette: one loaf is sufficient for this recipe, but if you’re serving a lot more people you may want to double the recipe and buy two baguettes
  • Mozzarella or Parmesan: you won’t need more then a quarter of a bag or a single block if you’re grating

Directions:

  1. I like to start with the bread so I can prepare the bruschetta while the bread is in the oven.  Preheat your oven to 400 degree and slice up the baguette into relatively thin slices (maybe half an inch) and place them on a baking sheet.
  2. Next brush every piece with olive oil.  Then sprinkle garlic powder over every piece, as well as black pepper. 
  3. Then sprinkle every piece with shredded cheese (or if some of your friends or family don’t like cheese, only sprinkle half of the pieces).  Stick the baking sheet into the oven for about 13-15 minutes, or until the bread is golden brown and crispy on the outside.
  4. Now you’re ready to start the bruschetta.  Drain the can of diced tomatoes, making sure all the extra juice is gone, and place them in a medium-sized bowl.
  5. Next add the olive oil.  I’m not a big fan of measuring things out when I cook, but my guess would be about a tablespoon and a half.  As long as it looks like the tomatoes are moist enough (without being soaked) in olive oil, you’re probably good.
  6. Then toss in about a tablespoon of the canned chopped garlic and stir everything together.
  7. After that throw in the dried spices: oregano, basil and a dash of crushed red pepper.  I would say use about two teaspoons of the basil and oregano, maybe more.  You want the mixture to look about two parts red and one part green once everything is stirred together.
  8. Add about a teaspoon of black pepper and sprinkle salt to taste.
  9. Stir everything thoroughly, but not too much since you don’t to come up with some sort of tomato sauce
  10. When your bread is done, let it sit for a few minutes, then arrange the pieces on a serving tray.
  11. Place a spoonful of the bruschetta on each piece of bread, making sure not to load too much on each piece so it’s not hard to pick up the bread and eat it.
  12. If you have some dried parsley powder around, it’s nice to sprinkle some on each piece of bread.  The green adds a pretty touch.

Here’s a visual guide:

Starting with the bread gives you time to make the bruschetta, so that the bread is done around the same time the mixture is done, and you’re ready to go faster.

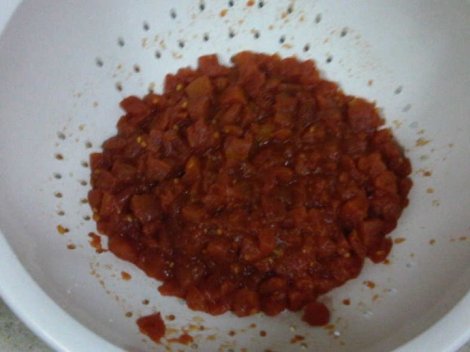
Strain the tomatoes:


Next add all your spices:

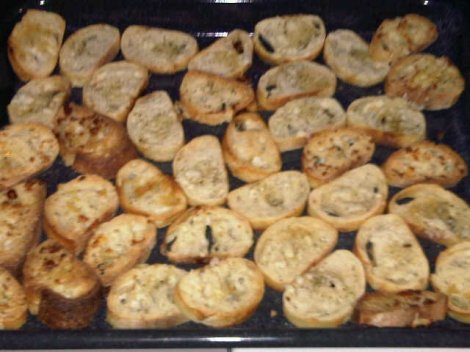
Take out your bread and let it cool for a few minutes:

Place a spoonful of bruschetta on each piece of bread and you’re ready to serve:

And that’s all!  Easy enough, right?  It’s so fast, and everyone loves it (ask my friends and family, they’ll attest).  The best part is, if you have leftovers you can do almost anything with it: put it on chicken or steak, on top of salad, or just on it’s with wheat thins or pretzels.  Another Italian classic done easy and cheap… enjoy!

Here’s some other tasty bruschetta recipes to try:

A fresh bruschetta recipe from Giada de Laurentiis of the Food Network

An extensive guide to from Bruschettarecipe.org

About.Com\’s bruschetta page featuring a variety of ideas and recipes to try

Comments (2) »

Craving Mexican? Behold, your sizzling solution

It recently dawned on me that I haven’t strayed much from Italian food when choosing recipes to share.  Don’t get nervous, I can never get too far, it’s my favorite.  But to mix it up a little, my roommates and I went with my favorite Mexican meal… Fajitas!  It’s largely unknown, but there are actually a ton of varieties of fajitas to try.  Some restaurants (Chili’s, Chuck’s Margarita Grill), offer many different spins on the traditional by using Cajun or chipotle recipes, and I’m going to give you my personal twist on the classic, so you can make it at school or at home instead of going out.  It’s a barbecue chicken fajita, and you can use as many or as little of the ingredients you like to customize your dish!

You’ll need:

  • Boneless, skinless chicken breast: for three people we used 4 good-sized pieces
  • Barbecue sauce: pick your favorite, here’s mine
  • One pack of flour tortillas: the small fajita size (Perhaps more if you’re serving for more people)
  • Black pepper
  • cayenne pepper (Can’t have good fajitas without a little spice!)
  • oregano (dried works better here)
  • Cilantro leaves (fresh)
  • Shredded cheese (Mexican blend)
  • Scallions, chopped 
  • Red onions cut into small slices
  • Salsa
  • About half a head of garlic (3 or four cloves), chopped into very small pieces
  • One lime, cut in half
  • One sliced tomato (I prefer this recipe without, but of course prepare it as you like)

Directions:

  1. Wash and dry the chicken breasts (that have already been defrosted) and get rid of all the fatty edges if you see any
  2. Rub the chicken in barbecue sauce, covering every inch and then sprinkle with black pepper, oregano and a dash of cayenne pepper, and small pieces of garlic.  Do this to both sides of the chicken breasts
  3. Drizzle olive oil over a pan and throw them in over medium-high heat (If you have a grill, by all means use it.  Those of us away at school will make do).
  4. Let the chicken cook here for a while, occasionally adding more barbecue sauce to the pan and more oregano and garlic powder if you have some to make sure it doesn’t lose its flavor.
  5. While the chicken is cooking, wash and slice up all your vegetables.  Have your roommates or friends help you here too, so you can keep an eye on the chicken.  Slice up the red onion, scallions, tomato and cilantro leaves (slice the leaves off the stem).
  6. Put all of these toppings in small bowls separately (along with salsa and shredded cheese).  I find that making a buffet line works best with fajitas so people can add or skip toppings as they choose.
  7. When the chicken if fully cooked (always make sure you cut through with a knife to make sure it’s not pink), slice it up into strips and place the plate of chicken next to your toppings line.  
  8. Here’s a trick for the tortillas: many people eat them as is, and some put them in the oven to heat them up, but if you leave the stove top that you cooked the chicken on, with someone ready with a plate in hand, simply place the tortilla on the hot stove top and after a couple seconds flip it over, and you’re left with a warm, slightly charred tortilla (see the picture of the finish product).  You just have to be sure that someone is ready to eat it, because otherwise it gets cold fast.
  9. Make sure you don’t leave that stove on, and you’re ready to load your fajita with all the toppings. When you’ve added all the toppings, squeeze the fresh lime over the entire fajita, and roll it up. Remember these tortillas are small, so don’t overstuff!

If you don’t have all of these ingredients, don’t sweat it.  You can make great fajitas without going all out.  It’s not that important to get scallions if you have red onion, and any type of cheese will work.  But if you have time to pick some things up (and these aren’t expensive- cilantro leaves I got for a little more than a dollar, a lime for 79 cents, etc.) then definitely do, because for this recipe all the ingredients really go a long way, especially the cilantro and lime.

For a great Mexican meal, serve with chips and salsa (Looking to make your own salsa?  Try this easy recipe from the Food Network), and preferably a Corona or margarita (Gotta use the leftover limes for something, right?).  Disfrute! (If my memory of spanish vocab serves me correctly, that means enjoy?).  If you’re feeling creative and come up with something new or you already have your own recipe, I’d love to hear your favorite twists on the classic fajita recipe!

Here’s a few links to some great ideas and unique dishes incorporating fajitas recipes:

The Food Network’s ‘All about Fajitas’ collection including fajita salads, soups and paninis:

DO NOT miss Paula Deen’s Gold Medal Sizzling Fajitas

A unique fajita marinade from AllRecipes.com

AllRecipes.com lists their top 20 Fajita recipes

Comments (2) »

“You better cut the pizza in four pieces because I’m not hungry enough to eat six.” -Yogi Berra

I know, a Red Sox fan turning to a Yankee for quotes, not cool.  But I like it, and it rings true, especially in this case.  Pizza is one of my FAVORITE things to make for a variety of reasons.  It’s super quick and easy.  There’s really no need for measurements or directions of any sort.  You can pretty much put anything edible on a pizza and as long as you cook it for the right amount of time it’ll probably come out good.  It’s one of the best recipes to get creative and have fun with, and that’s my favorite part.  

The pizza my roommates and I made last night is a relatively healthy recipe, and it’s pretty low budget: all the ingredients came out to about $15 (less if you already have some things at home).  It’s also the reason I chose the quote above.  No matter how hard we tried, the entire thing was gone by the end of the  night.  It’s a white pizza with mozzarella, tomatoes, basil and roasted garlic, and everything you’ll need to know is listed below.

You’ll need:

  • 1 lb Pizza dough (I usually just buy it at the store, but you can make it too if you’re feeling daring)
  • Flour (enough to cover your surface and the dough)
  • Basil leaves.  Here’s where we ran into trouble!  Good ole’ Grand Union (the Storrs grocery store) didn’t have any fresh basil leaves, so we had to resort to dried basil.  But if you can get your hands on the fresh stuff, it really does make a difference.
  • Tomato: about one half, sliced thin
  • Mozzarella cheese
  • Parmigiano-Reggiano cheese
  • One head of garlic: you may not need the whole thing, probably only half or a few cloves
  • Oregano(dried or fresh, up to you… once again, Grand Union fails in the herb department)
  • Salt and pepper, to taste

Directions:

  1. A few hours before (or overnight) you need to let the dough rise.  Roll it into a ball and cover it with flour before putting in a bowl covered with Saran wrap and keep somewhere in room temperature.  Last night we were crunched for time, so I only let it rise for about 2 or 3 hours and it came out fine.
  2. Once the dough has risen, you’re ready to start making the pizza.  Before anything, preheat your oven to 275 and chop up the garlic clove.  Now there is a certain way to do this, so for those of you new to the kitchen, check out this video to see how it’s done.  Once you’ve chopped the garlic into really, really small pieces, throw it all on an oven sheet and stick it in for about 7-10 minutes or until it’s golden brown.
  3. While the garlic is roasting, slice up your tomato half and the mozzarella cheese.  We loooove mozzarella at my apartment, so the more the better.  But for a healthier option, ease up on the cheese and add more tomatoes.
  4. Roll your pizza dough out into a flat circle or rectangle.  We use a rectangle to fit the cooking sheet we have, and a point that I continuously fail to remember (including last night) is that it’s always better to prepare the pizza ON the cooking sheet, because transferring it can be a major production (picture all three of us with spatulas heaving the thing onto a sheet trying not to spill flour and cheese everywhere).
  5. If you don’t have a rolling-pin, try to flatten the dough as much as possible using spoons and your hands.  Make sure you get all the air bubbles out.  With a pin, it may not look pretty, but I guarantee you’ll get the same taste, which is definitely what’s important.
  6. Don’t forget about your garlic in the oven, you’re going to want to check on it periodically so it doesn’t burn.  When you eventually take it out, turn the oven up to 400 degrees.
  7. Next add all of your toppings.  I like to start with a base of parmigiano-reggiano, spread evenly all over the entire pizza.  Next layer on your mozzarella slices and tomato slices and fresh basil leaves.  The best presentation is when these are spread evenly with only minor overlaps (you don’t want to cover all of the tomatoes with mozzarella, etc.).  Don’t forget about the garlic in the oven!  Mix these small pieces in as well.
  8. Next spice it up with oregano (dried in this case), and some salt and pepper, and you’re good to go!
  9. Throw it in the oven (hopefully you’ve already turned it up to 400, if not, do so now) for about 13-20 minutes, or until it’s golden brown on the edges, and the cheese is melted golden on top.  If you use a lot of cheese like we do, it may take longer (less cheese, less time, obviously).  I know 13-20 is a wide range, but I say that because some people like it crisper than others.  We tend to use the entire 20 minutes, but make sure you keep checking on it to decide when you want to take it out.

Here’s a visual step by step, so you can check your progress by comparing to the pictures:

chop up and roast the garlic

Roll out your dough and cover lightly with four

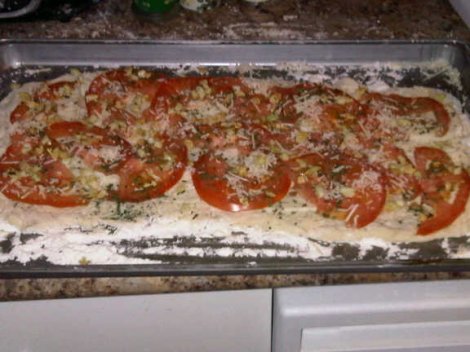
Cover with toppings, spreading everything evenly

Throw it in the oven at 400 for 13-20 minutes, or until golden brown and crispy on the edges

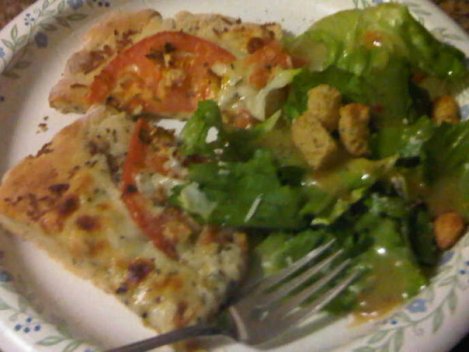
Give it a minute to cool, then serve with salad for a delicious meal!

And there you have it!  The recipe does sound a little intimidating, but I promise it’s easier than it sounds.  Like anything else, practice makes perfect, and before you know it you’ll be making a menu’s worth of pizzas, and I want to hear all about it!  Send me recipes for your favorite pizza, or if you have any topping ideas you’d like me to test out, please let me know!

I give extensive praise to the Food Network, per usual, and their wealth of information about making pizza and dough.  There are hundreds of recipes to try on their website, from plain and simple to exotic and unusual.  

Here are some other great websites to check out when making pizza:

Just like it sounds: pizzamaking.com

Pizza fan Billy Reisinger and his very thorough pizza making guide

Making pizza from allrecipes.com: be sure to check out all the links on this page for different types of pizza!

Comments (1) »

Le Gourmet potato

Eating healthy is far too often a battle while cooking for oneself at college, so I’ve found that the more recipes I gather that provide a healthy balance for a meal, the better. One easy item to modify is the potato.  They’re cheap and can be bought in bulk.  They’re perfect to pair with chicken or a sandwich, and if prepared the right way, they can offer a healthy alternative to other types of sides.  Follow the directions below for a gourmet twist on the classic french fry!

You’ll need:

  • Potatoes (I prefer red skinned), for three people we use four potatoes
  • Italian dressing
  • Oregano(dried is fine and works well in this case), about one and half teaspoons
  • Garlic powder, about one teaspoon
  • Cayenne pepper, about half a teaspoon (more or less depending on how spicy you want them)
  • salt and pepper (to taste)
  • Parsley, about a teaspoon (again, dried works well here)
  • olive oil

Directions:

  1. After washing them thoroughly, slice up your potatoes into long strips, the way you would see french fries sliced.  I like to keep the skin on, but you don’t have to.
  2. Drizzle a couple teaspoons of olive oil in a sauce pan over medium-high heat
  3. Add all the potatoes to the sauce pan
  4. Drizzle Italian dressing over the potatoes.  Don’t be too concerned with trying to cover every inch of each strip- they will get mixed in.
  5. Add your other ingredients (oregano, parsley, salt and pepper, parsley, cayenne pepper, garlic powder) spreading them evenly over the potatoes
  6. Stir the potatoes and spread out all the ingredients with a spatula
  7. Keep sauteing them for about five-ten minutes, or until they are semi-tender.  While you’re stirring, pre-heat the oven to 425 degrees
  8. Take the potatoes off the heat and let them sit for a few seconds before transferring them to a baking sheet.
  9. Spread the strips out and make sure none are on top of each other so every piece cooks
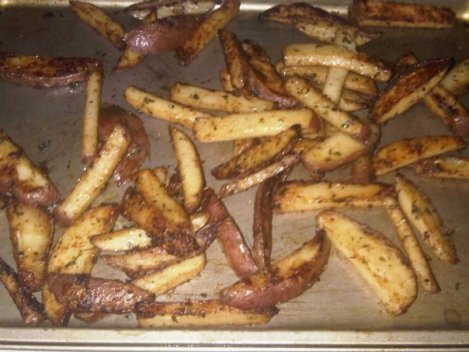
  10. Throw them in the oven for about 15-20 minutes, or until they’re crispy and hardened on the outside
  11. When you take them out, sprinkle some pepper and a little more parsley over them for taste and decoration

(See the photos below for what the phases of the process should look like)

They might need a few minutes to cool down, but after that you’re free to dig in!  Enjoy them with chicken and salad, or a sandwich or a healthy, balanced meal.

Slice up the potatoes:

Throw them in a pan and add your ingredients:

Saute for about 5-10 minutes:

When they’re pretty tender, take them off heat and put on a baking sheet:

Bake for about 15-20 minutes, or until hardened, and ta-da, you’ve got some gourmet (healthy) fries!

Comments (1) »

Snow day stuffed bread

 One of UConn’s finest qualities?  Definitely snow days (Thanks, Jay Hickey).  They’re the best opportunities to polish your cooking skills, and this Wednesday afternoon my roommates and I are making some delicious stuffed bread.  It sounds and looks complicated, but don’t sweat: it’s actually a pretty simple process, and I’m going to take you through it step by step.  You may not have these ingredients lying around, and without access to a grocery store it might complicate the process, so you try it another time!

Here’s what you’ll need:

  • A little bit of flour, if you don’t already have some, or if you can’t find anyone to borrow about a cup of it from. If not, buy the smallest amount possible.
  • Two pounds of bread dough (or more depending on how much you’re making).  You can buy it if you want, but I usually just buy it, and you can find it near the refrigerated cheese section or near the deli meats
  • Your “stuffing.”  I like to use one full bag of shredded mozzarella cheese and pepperoni slices.  I also had some parmesan cheesein the fridge today, so I threw some of that in too.  For a healthier option, try onions or green peppers with low-fat cheese.  Ricotta cheese also works well in the bread.  This is where you can get creative, you can pretty much throw in whatever you like and it’ll probably come out good, as long as you don’t over-stuff it.
  • Make sure you have some olive oil in your kitchen.  If you don’t, shame on you.
  • You’ll also need some seasonings.  I like to use oregano, basil, garlic powder, black pepper and a little bit of crushed red pepper (more or less depending on your own taste buds)

Directions:

  1. Make sure you get the bread dough out early so it has enough time to rise.  I like to leave at least four hours.  The instructions should be on the packaging of your bread/pizza dough, but if not here’s what you do:
  2. After pre-heating your oven to 375 degrees, roll your dough into a nice ball and cover it in flour completely.  Then put it in a bowl and cover the bowl with saran wrap and leave the bowl to sit in room temperature for at least four hours.
  3. After the dough has risen, clear a space and cover the surface with flour.  Then roll out the dough (if you don’t have a rolling pin, spread it out best you can with your hands and smooth any air bubbles with a spoon) and continue to cover it completely with flour.
  4. Once your dough is flattened and spread out into a rectangle about 12 x 10 inches, make sure it’s lightly covered with flour, and then cover it with the full bag of shredded cheese parmesan cheese and pepperoni slices.  Make sure the entire is covered with the stuffing except the very edges.
  5. Sprinkle all the spices over the stuffing, and make sure everything is even.
  6. Here comes the tricky part.  You’re going to fold the bread into thirds.  To do this, imagine you’re separating it into thirds (you can draw a thin line with a knife if that helps).  Fold the outer sections over the middle sections.  You have to do this part quickly, otherwise the stuffing will spill out, so do one side at a time and refer to the picture to see what I mean by folding it over.  
  7. Once you fold it over, make sure none of the stuffing is coming out of the side and that the three sections are even.  Then lightly brush some olive oil over the top of the bread.  I like to sprinkle a little bit of the shredded cheese if there’s any left over the top as well.
  8. Next take a sharp knife to make three slits across the tops, and then three more slits across those ones, so that there are three x’s on the top of the bread.  Don’t make large holes in the bread, just thin slits big enough to let some air in while it’s in the oven (refer to the picture).
  9. Now you’re ready to put the bread on a cooking sheet (be careful here- have someone help you so that you transfer it carefully using a spatula) and pop it in the oven for 20-25 minutes, or until it’s golden brown on top.
  10. When it’s all done, let it cool for a little bit before cutting it up and make sure the outside is hardened.
  11. Next cut the bread into slices about an inch wide and four inches long.  Depending on how you fold it and how it turns out (it’s different every time for me), you may have to cut the entire loaf into two slices before cutting it into slices (Again, refer to the picture to see how I cut it).  You can cut it any way you like, it all tastes the same in the end!
  12. Some people like to dip the bread into warm marinara sauce, and others like myself enjoy it all on its own, you be the judge!

Enjoy the snow day and enjoy the bread!  Leave me a comment about what you and your roommates like to cook on snow days, I’d love to get some more great ideas 🙂

5 cooking projects for snow days from thekitchn.com

Recipes from another blogger taking advantage of the snow day by cooking


Comments (1) »

The Classic Go-To: Tomato and Mozzarella Salad

Everyone has a go-to meal, whether it be gourmet or microwavable.  Mine happens to be one of the fastest, easiest and most affordable dinners around.  You got it: tomato and mozzarella salad.  Yum!

There are many variations on this classic, so play around with different types of tomatoes and dressings.  Since it’s such a favorite of mine, I’ve sampled this meal all over the place, at almost every restaurant I visit that serves it.  My favorite was by far at  Moe’s Barbeque restaurant in Vail, Colorado.  They called it a Caprese Sandwich, and it was loaded with thinly sliced tomatoes, thick mozzarella, and of course lot of fresh basil.

Here’s a video from Laura McIntosh and Jeff Mosher from Bringing It Home that shows another great recipe I like:

Another great recipe is Giada De Laurentiis from the Food Network’s “Everyday Italian.”

Okay so the moment you’ve all been waiting for: my quick and easy college-style tomatoes and mozzarella recipe:

You’ll need:

A few ripe tomatoes (depending on how many people you’re cooking for)

Fresh mozzarella cheese- I like part skim, but it’s up to you!

Fresh Basil (Dried basil works well too, but using fresh basil really does make a difference if you have access to it)

Directions:

Slice a full-sized tomato into about eight thin slices.  

Now slice up the cheese into slices about half an inch slices.  Make sure they’re the same size slices as the tomatoes, so they can fit on top of each other.  

Now splash on your favorite balsamic vinaigrette.  I use Ken’s creamy balsamic dressing (available at most food stores).  If you’re feeling daring, make your own balsamic using olive oil, balsamic vinaigrette, and other spices.

Top it off with fresh basil, then add a little black pepper, garlic powder and oregano if you have some and you’re good to go.  

The salad is great by itself, but some Italian bread can be an excellent side choice.  Slide up a loaf, place the pieces on a baking sheets and on each piece drizzle some olive oil then sprinkle garlic powder, black pepper and grated parmesan cheese.  Throw the baking sheet in the oven for 15 minutes at 375 and then you can use the bread either on the side, or place you salad on top of the bread.

Bon appetit!

If you try this recipe out in your kitchen, make sure to leave a comment and let me know how it came out!

Comments (2) »